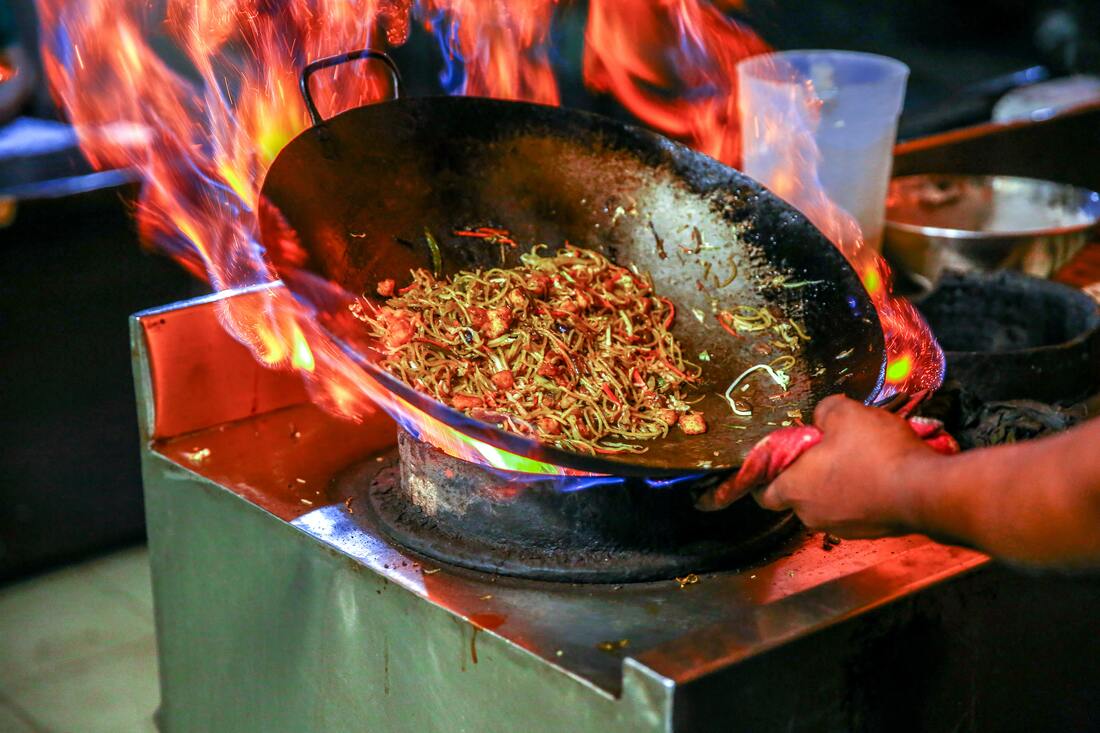
 Photo by Prince Photos from Pexels Buying a wok The wok is the most versatile and handy tool in the kitchen and a good cast iron wok, the basis of all Chinese cooking. A good cast-iron wok, when handled properly, will be your companion for years to come and your relationship with it will only get better and stronger with time ;) We've all heard of "wok-hei" or the breath of the wok - it's that special kiss of flavor your cast-iron wok imparts to your recipe. So, if you want your fried rice and Chinese stir-fries to taste like your favorite Chinese restaurant, then forget your regular pans, head over to Chinatown and invest in a good cast-iron wok. Size - Woks come in several sizes, so pick one that is best suited to your own needs - depending on your stove size and the number of people you'd be cooking for. Personally, I prefer not to cook for more than 4 people at a time in my large wok. This is to ensure that there is enough surface area on the wok for the ingredients to comfortably mingle with each other and be in contact with the surface of the wok. Handles - Some woks come with metal handles and therefore rely on the use of a tea-towel to keep them in place (like the one above); these are great for seasoned Chinese chefs to put on a show. Others come with comfortable wooden handles and work perfectly for home-cooks (like the one below). 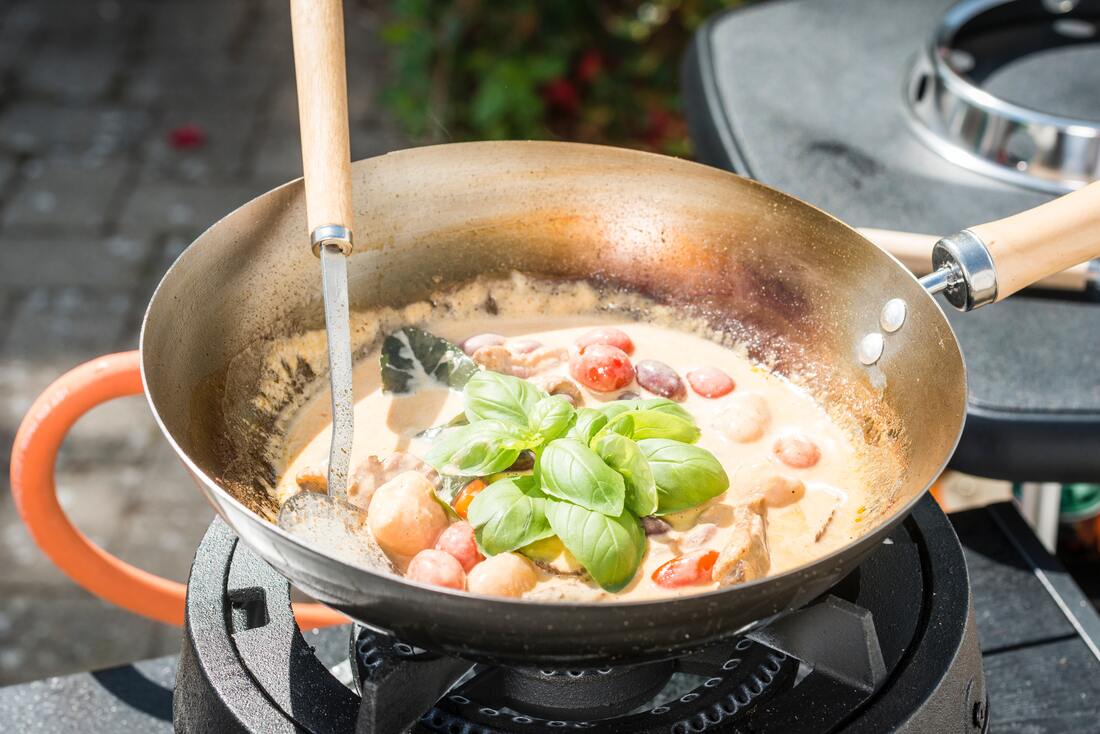 Photo by HOT WOK from Pexels How to clean a wok for the first time? New woks are generally covered in nasty factory oils to keep them from going rusty during shipping and storage. Before you season your wok, it is important to remove all the nasties and the dust it may have collected over time; this is probably the only time you will thoroughly clean your wok using a heavy-duty scrub. Follow the steps below to get your wok squeaky clean, 1. Clean your wok inside out with dish soap, hot water and a heavy duty scrub, until squeaky clean. Rinse well, then wipe it dry with kitchen towels. 2. Place your wok on your stove top and switch on the flame on medium-high heat. Let the wok heat up and dry completely. Your wok is now ready to be seasoned. How to season a wok? These may look like a lot of steps but they are really easy to follow.
STEP 1: Removing Excess Residue 1. Place your wok on a stove-top on medium-high heat. Pour a tablespoon of vegetable oil into the wok (any oil with a high smoking point will work). Using a few layers of folded kitchen-towel, spread the oil all over the inside of the wok. Be careful not to burn your fingers while doing so. 2. Continue to heat the wok until the oil reaches its smoking point. Keep your exhaust going and windows open while doing so, as it will get smoky at this stage. 3. Reduce heat to low and move the oil around the inside of the wok. The oil will start to thicken and change to a darker color at this point. 4. Rinse the wok with soap and hot water to get rid of the dark residue. Dry with paper towels and proceed with STEP 2. STEP 2: First Layer of Seasoning 1. Place your clean wok on medium flame and let it heat up. 2. Add a tablespoon of vegetable oil and swirl it all around the inside of the wok. 3. Continue to heat the pan for 10 minutes, changing it position and exposing different parts of the pan to direct heat. Keep you exhaust on and windows open. 4. You will see more dark residue toward the end but this time slightly clearer than it was before. 5. Rinse the wok with soap and hot water again to get rid of the unwanted residue. Dry with paper towels and proceed with STEP 3. STEP 3: Stain Removal 1. Heat up your wok again and scrape away any burnt bits using a metal spatula. To remove any stains on the bottom of the wok, pour a bowl-full of water and bring to the boil. Discard the water, and clean the wok again with soap and hot water. Dry with paper towels. Proceed with step 4. STEP 4: Second Layer of Seasoning 1. This step is similar to STEP 2. Place your clean wok on medium flame and let it heat up. 2. Add a tablespoon of vegetable oil and swirl it all around the inside of the wok. Using a well folded kitchen towel, rub the oil well into the surface of the wok. Be careful not to burn your fingers. And, remember to keep your exhaust on and windows open. 3. Continue to heat the pan for 10 minutes, changing it position and exposing different parts of the pan to direct heat. This time the oil should be clear, with no dark residue in it. 4. Rinse the wok with soap and hot water again. Dry with paper towels and proceed with STEP 5. STEP 5: Final Coating and Storage 1. Your wok should now look clean and smooth. It's time to apply the final coating and this time all over the inside and outside of the pan, to keep it from going rusty during storage. 2. Pre-heat your wok on medium flame until smoking. Pour a tablespoon of vegetable oil; using a paper towel rub oil all over on the inside of the wok. Set aside to cool and rub some oil all over the outside of the wok too. Your wok is now ready to stored away. Repeat step 5 each time after using and washing your wok. Cooking in your cast-iron wok creates a "patina", a protective coating on the inside of the pan. Every time you cook with oil in your wok, the patina becomes thicker and heavier closing the pores and creating a natural, non-stick surface. This protective layer also prevents rust and corrosion caused due to humidity. and enhances the flavor of your dishes. The more you use your wok, the more you enhance the patina :) Wok Cooking Tips
Invest in a good cast iron wok if you do any amount of Chinese cooking. Woks are practically indestructible - a good wok will last you for years to come. Happy woking!
0 Comments
If you are anything like me and your life revolves around the kitchen then you are in the right place. I have always dreamt of living in a house where the kitchen is the largest room, and everything revolves around the kitchen, the hearth, and around family meals. Welcome to Kitchen Essentials! Here, I will be sharing with you my best kitchen tips, tricks and hacks - all things food. POTS AND PANS - OR SHALL I SAY "COOKWARE"  I have recently seen many brands trying to sell their 12-15 piece cookware sets. Are they worth it, and do you really have the space for it... probably not! I won't lie, I am quite greedy when it comes to owning different kinds of pots and pans, and have probably brought a piece of cookware back from every country that I have been to. But do I use them all? Not really ;) There are probably only about 6-7 pans in my kitchen that I use regularly, 1. Medium-sized, light frying pan - for frying eggs, and dry-roasting spices 2. Flat-griddle - for making pancakes and flatbreads 3. My cast-iron wok - for making Chinese food 4. Large heavy base wok - for making curries and thick sauces 5. Small kadhai (Indian deep-frying pan) - saves oil because of its circular bottom 6. Pressure cooker - for cooking stews, beans, and red meat (see more information about how to use a pressure cooker in my ALL ABOUT LENTILS blog post) 7. A large sauce pan - for cooking pasta and making stews Sri-Lankan hoppers in the making...HOW DO I CLEAN AND MAINTAIN MY COOKWARE WITHOUT DAMAGING IT? 1. Cast iron pans and woks: Good cast iron pans and woks will last you a lifetime and more. The best way to keep your cast iron pan clean is by scrubbing it with coarse salt and a paper towel. Use a little soap (if necessary) on a soft sponge and rinse with hot water. Once clean, dry immediately and heat again on medium flame to make sure it's completely dry. Finally, using a paper towel rub about 1/2 teaspoon vegetable oil all over the interior of the pan, to prevent oxidation. As and when I want to use my cast-iron pan for making pancakes or my traditional hopper pan to make Srilankan crepes, I like to ensure that they don't stick to the pan. Here is a handy tip to make your metal pans non-stick (video above) - simply halve an onion and stick a fork through the peel. Then, rub the onion flesh-side down all over the interior of the hot pan. Repeat the same process before making each pancake or crepe, if necessary. Onions contain sulfur compounds which when heated react with bare metal to form a hard, non-stick sulfide layer, thereby preventing food from sticking. This simple trick works on griddles, cast-iron pans, and grill grates. 2. Non-stick pans and griddles: Avoid using abrasive liquids when cleaning non-stick pans. I have had my non-stick pans for years - I wipe them clean with a damp cloth while still hot to remove excess oil (as the oil tends to solidify on the surface once they cool down). Once cool, I simply rinse them with hot water, and dry them before putting them away. And I only ever use wooden spoons and spatulas on all my non-stick cookware.  KNIVES I am the biggest fan of expensive knife sets and totally recommend getting one if you are a keen cook. A good knife set will last you a life time. A typical set comes with 4 essential knives, 1. A chef's knife - used for chopping on a board (I have 2 as I use it a lot) 2. A fillet knife - long flexible knife used for filleting fish (I use it more for cutting Sushi rolls) 3. A pairing knife - for peeling and coring 4. A serrated knife - for slicing bread 5. Honing steel - rod-shaped steel tool used for keeping your knives sharp If you do already have the above set of knives, do remember to invest in a good knife sharpener (or have them sharpened outside). Honing steel basically pushes the edge of the knife back to the center and straightens it, whereas sharpening your knife grinds the bits of the blade and shaves it producing a new, sharp edge. Remember - a blunt knife is way more dangerous and can easily cause accidents as the chances of it slipping on your onion and on to your finger are way higher. Always, always make sure your knives are properly sharpened. HOW OFTEN SHOULD I HONE OR SHARPEN MY KNIVES?
Wish to learn more about Wok Cooking or simply want to hone your knife skills, join us for one of our fully hands-on cooking classes in Singapore. Or simply book a private cooking class. |
AuthorPayal Thakurani is a cooking instructor, consulting chef, and author of the popular Southeast Asian cookbook “Curries for the Soul”. Originally based in Shanghai China, chef Payal has been in the food industry since 2012, working in training and brand development in central kitchens. She was also the proud owner of a cooking school and several food brands in Shanghai. She now lives in Singapore and heads Commune Kitchen in Downtown Gallery, where she hosts affordable, hands-on cooking classes for all ages. ArchivesCategories |
 RSS Feed
ServicesAs Listed On:

|
OUR KITCHENCommune Kitchen Pte. Ltd
182 Cecil Street #02-10/11 Frasers Tower 069547 |
|
© COPYRIGHT 2024. ALL RIGHTS RESERVED.